
Before diving into the intricacies of your pickled turnips recipe, let’s chat about what you can enjoy them with. They are anything but lonely on the plate. Jazz up your sandwich game with a crunch of pickled turnip to elevate your turkey or veggie options.
Pair them with grilled meats for a tangy side that cuts through the richness, or toss them into a vibrant salad for an added pop of color and flavor. You can even mix them into rice bowls to add a delightful zing that complements grains beautifully. The versatility of pickled turnips is simply astonishing!

You’ll Also Like These Recipes
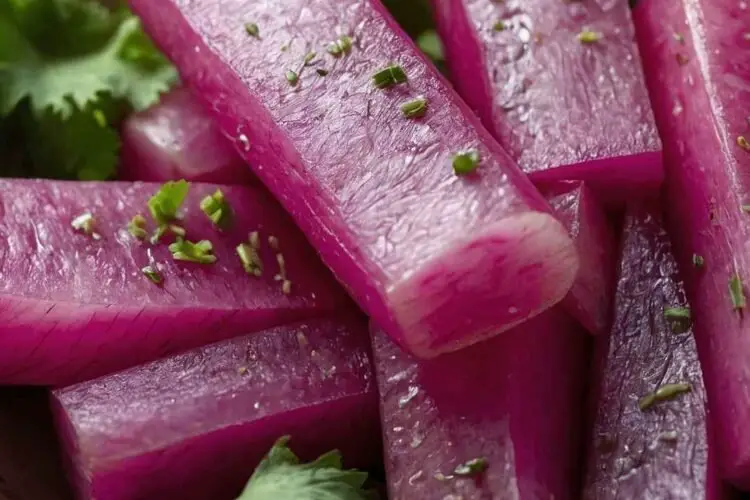
When I first tried pickled turnips, it was love at first bite. Their crunchy texture and tangy flavor enchanted my taste buds, and I felt as though I’d stumbled upon a hidden gem of culinary delight. Picture this: you’re at a local market, and you spot those rosy-pink turnips glistening in the sun. You know there’s more to them than meets the eye, and you’re absolutely right!
In this blog post, I’ll guide you through a delightful recipe for pickled turnips, sharing tips that sprout from my kitchen experience. You’ll learn about the ingredients, preparation, and the reasons this recipe stands out. Along the way, I’ll sprinkle in anecdotes, valuable insights, and answers to your questions. Let’s pickle!
Why This Recipe Works?
Optimal Flavor Balance
One bite of these pickled turnips and you’ll taste the delicate balance between tartness from the vinegar and the sweetness from the beets. The harmony of flavors plays beautifully together. This recipe hones in on that balance so that no ingredient overshadows the others.
Simple Ingredients, Big Taste
You might be surprised at the simplicity of the ingredients. With just a handful of items like fresh turnips, vinegar, and a few spices, you create something robust and flavorful. This recipe focuses on whole ingredients, allowing each flavor to shine through.
Quick and Easy to Make
The beauty of pickling is in its simplicity. You’re only a few steps away from creating a vibrant pickle. With a bit of prep, you’re set to begin your flavorful journey with minimal effort and maximum reward.
Long Shelf Life
Another remarkable aspect of pickled turnips is their longevity. When stored properly, they can last for several weeks in the fridge. This means once you’ve invested your time and energy into making them, you’ll be rewarded for weeks to come with a delicious snack or side.
How Does It Taste?
Imagine taking a bite and encountering a refreshing crunch. The first flavor you’ll notice is the vinegary tang, which immediately wakes up your taste buds. Gradually, the sweetness from the beets reveals itself, enveloping you in a gentle embrace.
The warmth of black pepper and a hint of heat from red pepper flakes create an intricate dance on your palate. It’s a complex, yet simple flavor that makes you crave more. You won’t just taste the pickles; you’ll feel like you’re enjoying a piece of culinary art crafted from tradition.
What Sets This Recipe Apart?
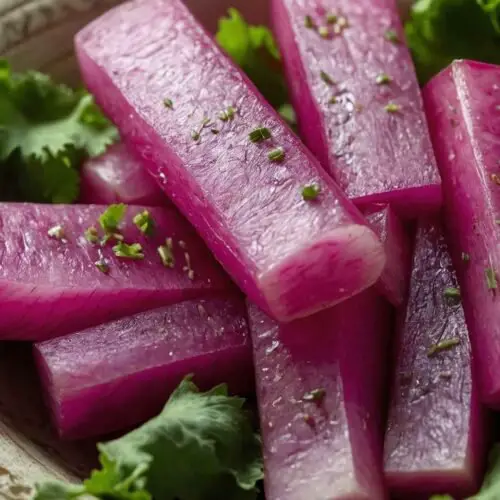
Many pickled turnip recipes call for similar ingredients, but what distinguishes this particular recipe is its emphasis on freshness and balance. By including beets, you achieve a stunning pink hue that is visually appealing and adds a subtle sweetness without overwhelming the palate. The optional addition of bay leaves imparts an herbal note that many recipes overlook.
Additionally, where some recipes steer you towards overly sweet or excessively sour flavors, this one finds a lovely middle ground. You’ll relish the experience rather than feel overpowered by acidity. This recipe places authenticity above all, bringing you one step closer to understanding traditional pickling while allowing modern twists.
The Ingredients
Here’s what you’ll need to create these delicious pickled turnips:
- 2 large turnips, approximately 2 pounds, peeled and sliced into ½-inch-thick sticks
- 1 cup distilled white vinegar
- ¼ cup coarse kosher salt (avoid regular table salt)
- Dried red chili peppers or red pepper flakes, optional, adjust to taste
- 3 cups purified distilled water (or filtered tap water)
- 1 small beet, peeled and cut into ½-inch-thick sticks
- 1 teaspoon whole black peppercorns (adds subtle aromatic warmth)
- 1 bay leaf (optional, for a gentle herbal note)

Instructions
Step 1: Prepare Your Turnips
First things first, peel the turnips. Resist the urge to skip this step; a naked turnip is crucial for achieving peak flavor when pickled. Cut them into ½-inch-thick sticks. They should resemble little soldiers standing at attention, waiting to be bathed in that briny goodness.
Step 2: Make the Brine
In a medium-sized saucepan, pour the vinegar, water, and bring it to a gentle simmer over medium heat. Add the kosher salt and stir until it dissolves completely. This creates the brine, the heart of your pickle. Smell the sharpness of the vinegar as it hits your olfactory senses; you’re well on your way!
Pro Tip: Allow the brine to cool slightly before pouring it over your turnips.
Step 3: Combine Ingredients
In a clean glass jar, layer the turnip sticks and beet sticks. As you go, sprinkle in the black peppercorns and red pepper flakes if desired. If you chose to utilize bay leaves for an infusion of flavor, add those now. Feel free to get creative with layering for an attractive presentation.
Step 4: Pour the Brine
Once your brine has cooled, pour it over the turnips and beets. Make sure every piece is submerged. If it looks like they’re floating like a boat on the sea, don’t stress. Just press them down gently to make sure they’re encased in that tangy bath.
Step 5: Seal and Store
Seal the jar tightly. Allow the mixture to cool to room temperature before placing it in the refrigerator. The pickles should start tasting tangy in about 24 hours, but for the best flavor, let them sit for at least three days.
Notes
- Store your pickled turnips in a clean, airtight jar to keep them crunchy and fresh.
- Remember to adjust the heat level based on your preferences. If you prefer more spice, don’t be shy to add more chili flakes.
- Play around with the ratio of vinegar to water based on your taste.
- For an extra flavor boost, consider adding garlic or ginger to the brine!
- You can double the recipe if you want to make a larger batch to share with friends and family.
Nutrition Information
The nutritional breakdown can vary slightly based on the portion size, but here’s an approximate estimate for a serving size of one quarter cup:
- Calories: 25
- Total Fat: 0g
- Saturated Fat: 0g
- Sodium: 500mg
- Total Carbohydrates: 6g
- Dietary Fiber: 1g
- Sugars: 1g
- Protein: 1g
These nutritious little bites are low in calories while providing a delightful burst of flavor.
How Do You Store This Pickled Turnips Recipe?
To store your pickled turnips, simply keep them in the refrigerator. They can last for up to three weeks, maintaining their crunch and flavor. Make sure your jar is sealed tightly to avoid air exposure, which can lead to spoilage.
Sides for Pickled Turnips Recipe
Here are a few suggestions on what to serve alongside your pickled turnips:
Grilled Chicken
Pickled turnips make for an excellent accompaniment to grilled chicken. The tangy flavor cuts through the richness of the meat, enhancing your meal with contrasting tastes.
Hummus and Pita
Serve your pickled turnips with a platter of hummus and warm pita bread. These pickles add a crunch that harmonizes beautifully with the creamy texture of hummus. It’s a match made in heaven!
Spiced Lentils
Pairing your pickled turnips with spiced lentils creates a delightful dish full of flavor and nutrition. The lentils serve as a hearty base, while the pickles add brightness, making for a satisfying meal.

What Alternatives Can You Use for the Ingredients?
Sometimes you may face a few missing items in your pantry. Here are some alternatives:
Turnips
If you can’t find turnips, radishes make an excellent substitute. They’re similarly crisp and will take on the brine’s flavor beautifully.
Vinegar
For those who prefer a milder taste, apple cider vinegar can replace distilled white vinegar. It brings a hint of sweetness while maintaining that necessary acidity.
Salt
If you’re out of kosher salt, sea salt works just as effectively. Just make sure it’s coarse and adjust to taste.
Beets
Don’t have beets? No problem! You can leave them out altogether or replace them with shredded carrots for a similar color and texture.
Pickled Turnips Recipe
Equipment
- saucepan
Ingredients
- 2 large turnips approximately 2 pounds, peeled and sliced into ½-inch-thick sticks
- 1 cup distilled white vinegar
- ¼ cup coarse kosher salt avoid regular table salt
- Dried red chili peppers or red pepper flakes optional, adjust to taste
- 3 cups purified distilled water or filtered tap water
- 1 small beet peeled and cut into ½-inch-thick sticks
- 1 teaspoon whole black peppercorns adds subtle aromatic warmth
- 1 bay leaf optional, for a gentle herbal note
Instructions
Step 1: Prepare Your Turnips
- First things first, peel the turnips. Resist the urge to skip this step; a naked turnip is crucial for achieving peak flavor when pickled. Cut them into ½-inch-thick sticks. They should resemble little soldiers standing at attention, waiting to be bathed in that briny goodness.
Step 2: Make the Brine
- In a medium-sized saucepan, pour the vinegar, water, and bring it to a gentle simmer over medium heat. Add the kosher salt and stir until it dissolves completely. This creates the brine, the heart of your pickle. Smell the sharpness of the vinegar as it hits your olfactory senses; you’re well on your way!
- Pro Tip: Allow the brine to cool slightly before pouring it over your turnips.
Step 3: Combine Ingredients
- In a clean glass jar, layer the turnip sticks and beet sticks. As you go, sprinkle in the black peppercorns and red pepper flakes if desired. If you chose to utilize bay leaves for an infusion of flavor, add those now. Feel free to get creative with layering for an attractive presentation.
Step 4: Pour the Brine
- Once your brine has cooled, pour it over the turnips and beets. Make sure every piece is submerged. If it looks like they’re floating like a boat on the sea, don’t stress. Just press them down gently to make sure they’re encased in that tangy bath.
Step 5: Seal and Store
- Seal the jar tightly. Allow the mixture to cool to room temperature before placing it in the refrigerator. The pickles should start tasting tangy in about 24 hours, but for the best flavor, let them sit for at least three days.
Notes
- Store your pickled turnips in a clean, airtight jar to keep them crunchy and fresh.
- Remember to adjust the heat level based on your preferences. If you prefer more spice, don’t be shy to add more chili flakes.
- Play around with the ratio of vinegar to water based on your taste.
- For an extra flavor boost, consider adding garlic or ginger to the brine!
Nutrition
Frequently Asked Questions
1. Can I eat pickled turnips right after making them?
You certainly can! However, the flavor improves significantly after sitting in the brine for a couple of days. You’ll appreciate the depth of flavor the longer they marinate.
2. What if I don’t like spicy food?
If you’re sensitive to heat, you can skip the red pepper flakes altogether or reduce them to suit your palate. The recipe’s delightful tanginess still shines without the spice.
3. Can I use different types of vinegar?
Absolutely! Experimentation is key in the kitchen. If you prefer a sweeter taste, rice vinegar or white wine vinegar can work wonders.
4. How do I prevent my pickled turnips from becoming soggy?
To maintain their crunchiness, ensure they are fresh and crisp before pickling. Proper brining and storage are crucial, so always seal your jars tightly and keep them chilled.
Conclusion
Crafting your own pickled turnips is an easy and rewarding endeavor. Not only do you create a refreshing and tangy addition to your meals, but you also get to explore the rich culinary traditions surrounding pickling.
With this simple recipe, you have the tools to turn humble ingredients into something extraordinary. So, gather your supplies and join me on this pickling adventure. Transform those turnips into a vibrant, tangy delight that will have family and friends lining up for seconds. Happy pickling!