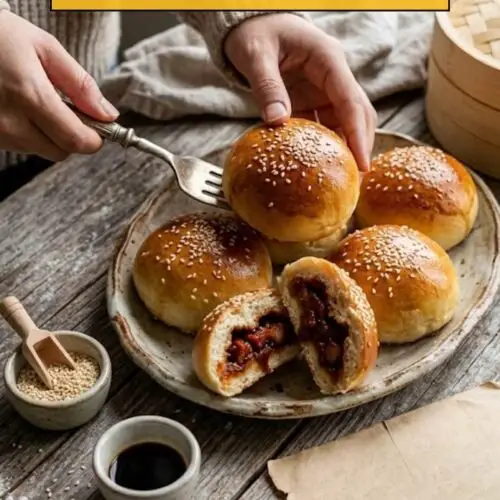
Baked Cha Siu Bao Recipe
Baked cha siu bao, or BBQ pork buns, are a beloved staple in Cantonese cuisine. An enchanting shape and taste define them, making these fluffy buns a fantastic option whether you are savoring them as a snack or impressing guests at a dinner party.
Equipment
- Stand mixer
- Mixing Bowl
- Rolling pin
- Baking sheets
- Parchment paper
- wok
- measuring cups
- spoons
Ingredients
- Here's the list with a few extra tweaks for added flavor:
For the dough:
- - 2/3 cup heavy cream at room temperature
- - 1 cup whole milk at room temperature, or 2% if preferred
- - 1 large egg at room temperature
- - 1/3 cup granulated sugar
- - 1/2 cup cake flour or substitute with all-purpose flour mixed with 1 tbsp cornstarch
- - 3 1/2 cups bread flour carefully measured to avoid air pockets
- - 1 tablespoon active dry yeast or instant yeast
- - 1 1/2 teaspoons salt
- - 1 teaspoon baking powder to help the dough rise even more
For the filling:
- - 2 tablespoons vegetable oil
- - 1/2 cup shallots or finely chopped onion
- - 2 tablespoons granulated sugar
- - 2 teaspoons light soy sauce
- - 2 tablespoons oyster sauce
- - 1 1/2 teaspoons sesame oil
- - 2 teaspoons dark soy sauce
- - ¾ cup chicken stock
- - 2 tablespoons all-purpose flour to thicken the sauce
- - 2 cups finely diced Chinese roast pork char siu
- - 1 tablespoon hoisin sauce adds a nice sweet and savory twist
To finish the buns:
- - Egg wash 1 egg, beaten with 1 tablespoon water
- - 1 tablespoon sesame seeds optional
- - 1 tablespoon granulated sugar dissolved in 1 tablespoon boiling water
Instructions
Step 1: Create the Dough
- In the bowl of a stand mixer fitted with the dough hook, start by mixing the dough ingredients. First, add the heavy cream, room temperature milk, and egg. Follow with the sugar, cake flour, bread flour, yeast, and salt. This specific order helps develop the dough evenly.
Step 2: Knead the Dough
- Turn the mixer to a low speed to combine the ingredients. You’re looking for a scraggly dough to form. Once it’s together, let it knead on low speed for about 15 minutes. If you notice it sticking to the sides of the bowl, turn the mixer off and help it come together with a rubber spatula. Alternatively, if you're feeling the love for a hands-on approach, you can mix in a large bowl and knead it by hand for 20 minutes.
Step 3: Perfect the Consistency
- Generally, the final dough should stick to the bottom but not cling to the sides. If you find your dough is overly sticky, particularly in a humid environment, add an extra tablespoon of flour at a time until you arrive at the perfect consistency.
Step 4: Proof the Dough
- Shape the dough into a ball and cover it with a damp towel or an overturned plate. Find a warm place for proofing—for about 75 to 90 minutes—until it doubles in size. I’ve had success using a closed microwave with a mug of hot water nearby to create a gentle warmth.
Step 5: Craft the Filling
- While waiting for the dough to rise, let’s whip up the filling. Dice the Chinese roast pork finely to make assembly easier. In a wok, heat 2 tablespoons of vegetable oil over medium heat, then add the shallots. Stir-fry for about 2 minutes until they become fragrant. Gradually mix in the sugar, light soy sauce, oyster sauce, sesame oil, dark soy sauce, and the hoisin sauce. Once it bubbles, incorporate the chicken stock and flour, stirring until thickened, around 2 to 3 minutes. Finally, add in the diced roast pork, combine well, then take it off the heat and let it cool on a plate.
Step 6: Prepare for Second Proofing
- Once your dough has risen, give it a quick punch down to release the air and knead for another 5 minutes. Dump it onto a lightly floured surface and form a ball. Cut it into 16 equal pieces—it's beneficial to weigh your dough for consistent sizing.
Step 7: Shape the Buns
- For each piece, knead out air bubbles and roll it into a circle about four inches wide. Remember to keep the center slightly thicker than the edges so that when you seal them, they hold that mouthwatering filling perfectly.
Step 8: Fill Your Buns
- Add one portion of the cooled filling to the center of each dough circle. With clean hands, carefully fold the edges to crimp and seal the bun tightly, keeping all that deliciousness in. Place them seam-side down on parchment-lined baking sheets—leaving about three inches apart.
Step 9: Final Rise
- Cover the shaped buns with a clean towel and let them rise at room temperature for another hour.
Step 10: Bake Away
- Preheat your oven to 400°F (200°C) with racks in the top and bottom thirds. Once heated, brush your buns with the egg wash and sprinkle them with sesame seeds, if desired. Lower the oven temperature to 350°F (175°C) immediately after placing the buns inside. Bake for about 22-25 minutes, until they turn a lovely golden-brown color.
Step 11: Sweet Finish
- As soon as they come out of the oven, brush the warm buns with the sugar syrup to give that extra shine and a subtle sweetness. Let them cool for a bit before you dig in!
Notes
- Room Temperature Ingredients: Make sure your cream, milk, and egg are at room temperature to help the dough rise properly.
- Watch the Proofing: Humidity can affect your dough. If it feels sticky, add flour gradually until it feels just right.
- Don’t Rush Cooling: Let your filling cool completely before stuffing the buns to avoid sogginess and ensure they hold together.
- Clean Hands Are Key: Keeping your hands free of grease when sealing the buns will help them close securely.
- Enjoy Variations: Feel free to add other ingredients to your filling, such as diced vegetables or mushrooms, to cater to personal tastes.
Nutrition
Calories: 200kcal
Tried this recipe?Let us know how it was!