
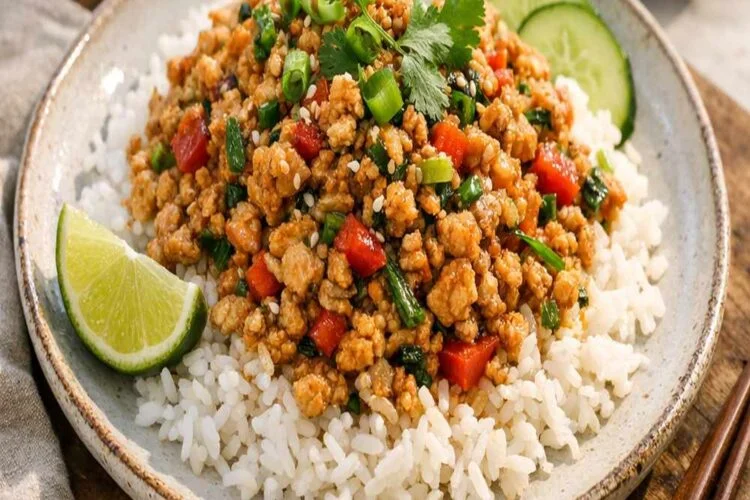
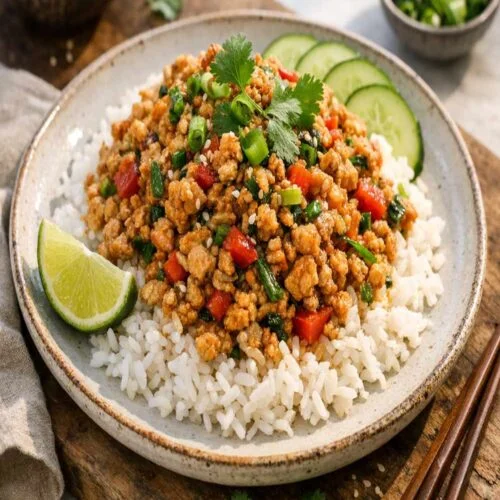
When I think about weeknight dinners that feel both nourishing and exciting, this Asian-inspired ground chicken dish is always on my rotation. It comes together in under 30 minutes, delivers incredible flavor, and gives you a complete meal packed with protein and vegetables. Whether you’re serving it in crisp lettuce cups, atop a vibrant bean sprouts salad, or over rice, this recipe proves that eating well doesn’t require hours in the kitchen or a list of complicated ingredients.
A Weeknight Dinner That Brought My Family Together
I’ll never forget the evening my grandmother taught me about the power of umami. I was probably twelve years old, standing on a stool beside her in her tiny kitchen, watching her layer soy sauce, sesame oil, and hoisin into a simple sauce. She explained that these flavors work together like a family—each one has its own role, but together they create something far greater than the sum of their parts.
That lesson stayed with me through nutrition school and into my practice. Years later, when I was developing recipes that could work for busy clients who refuse to sacrifice flavor for health, I remembered that kitchen moment. This Asian ground chicken recipe is my modern interpretation of what she taught me—it’s a dish built on understanding how ingredients interact, how proteins and vegetables work together to fuel your body, and how simple meals can become treasured traditions.
What is Asian Ground Chicken Recipe?
This is a versatile, quick-cooking dish built around seasoned ground chicken, fresh vegetables, and a luscious sauce that brings everything together with deep, complex flavors. Unlike heavy stir-fries that rely on excess oil, this recipe balances lean protein with the brightness of fresh peppers, the crunch of water chestnuts, and aromatics like garlic and ginger.
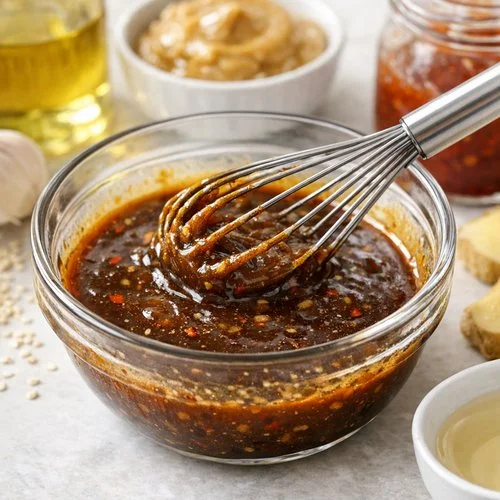
The magic really lives in the sauce—a combination of soy sauce, hoisin, sesame oil, and rice vinegar that creates layers of flavor. These aren’t random additions; each component serves a nutritional purpose. Soy sauce provides umami and a touch of sodium to enhance appetite, hoisin adds subtle sweetness and complexity, sesame oil contributes heart-healthy monounsaturated fats, and vinegar aids digestion while brightening the palate.
This dish has roots in Asian cuisine but isn’t tied to one specific country or tradition. Instead, it represents the beautiful crossover cooking we see today—taking classic flavor profiles and techniques, then making them accessible for everyday home cooks who want meals that taste like they came from a restaurant kitchen.
Why You’ll Love This Asian Ground Chicken Recipe
- Ready in under 30 minutes – From stovetop to table, this is genuinely a weeknight winner. I’m talking active cooking time of about 20 minutes total, which means you can have dinner on the table before 7 PM.
- Packed with lean protein and vegetables – One pound of ground chicken delivers approximately 26 grams of protein per serving, while the peppers and water chestnuts provide fiber, vitamins, and minerals. This isn’t a meal that leaves you hungry an hour later.
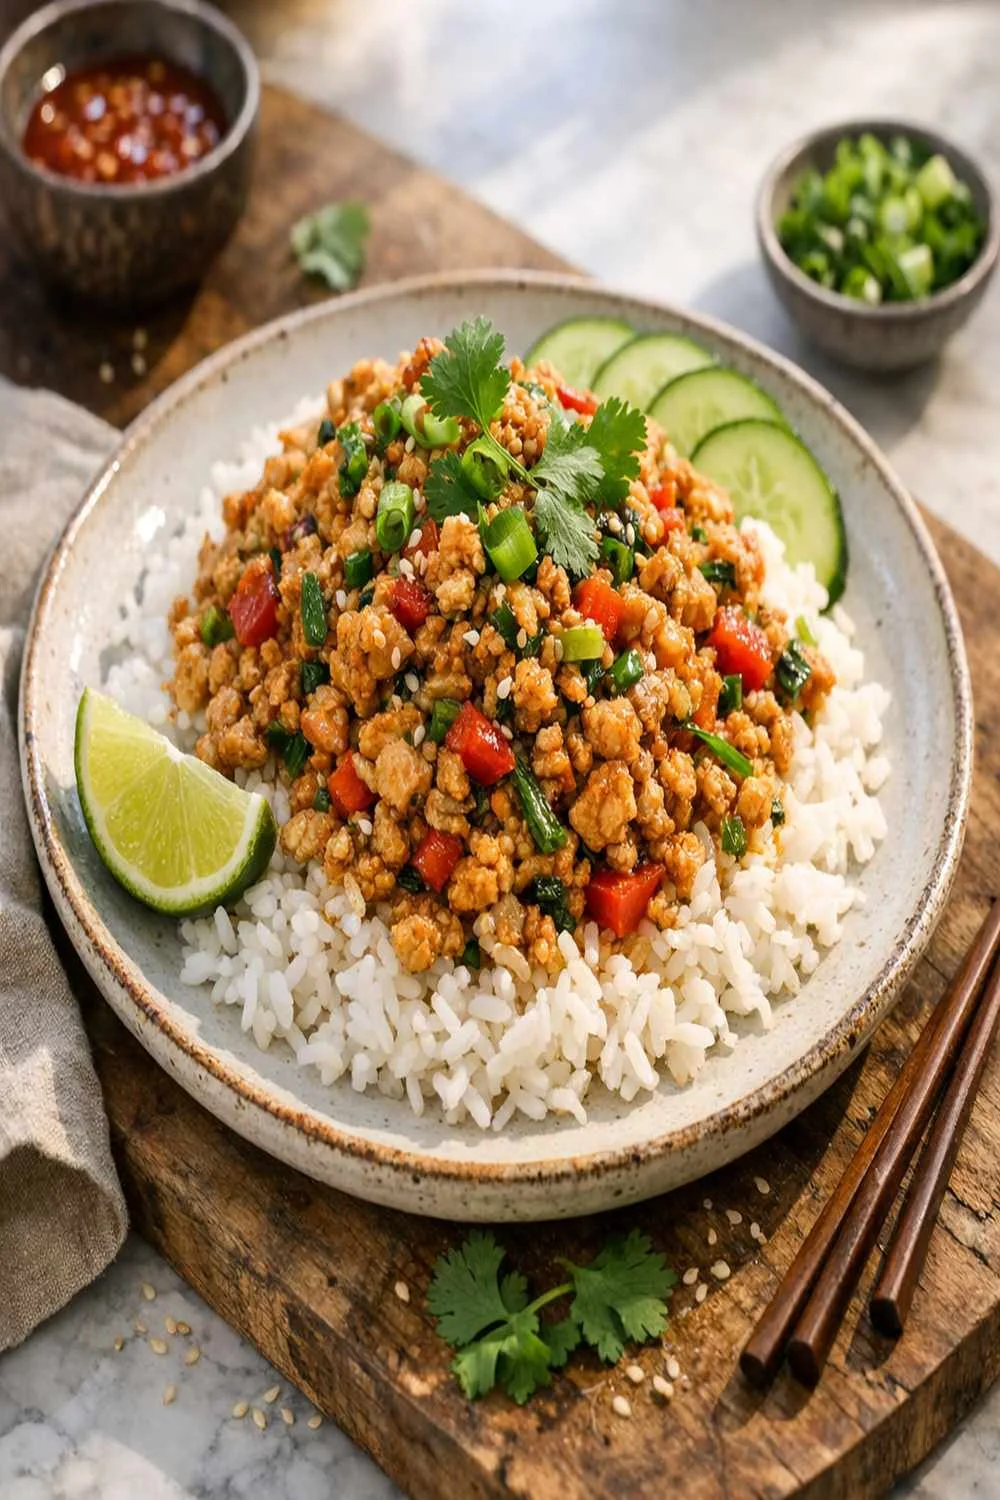
- Incredibly versatile for serving – You can serve it in lettuce wraps for a low-carb option, over brown rice for a more substantial meal, with noodles for something comforting, or atop a salad for extra vegetables. The same base recipe works beautifully with any of these vehicles.
- Uses pantry staples you probably already have – Once you stock your kitchen with soy sauce, hoisin, and sesame oil (which I recommend for any home cook interested in Asian cuisine), you’ll find these ingredients work in dozens of recipes.
- Kid-friendly and customizable – The mild sweetness from hoisin and honey appeals to younger palates, while the spice level is completely adjustable through the sweet chili sauce. I’ve served this to clients’ children who are typically picky eaters, and they’ve always cleaned their plates.
- Excellent source of B vitamins and minerals – Ground chicken is rich in niacin and selenium, which support energy production and immune function. The garlic and ginger add compounds with anti-inflammatory properties backed by research.
The Ingredients
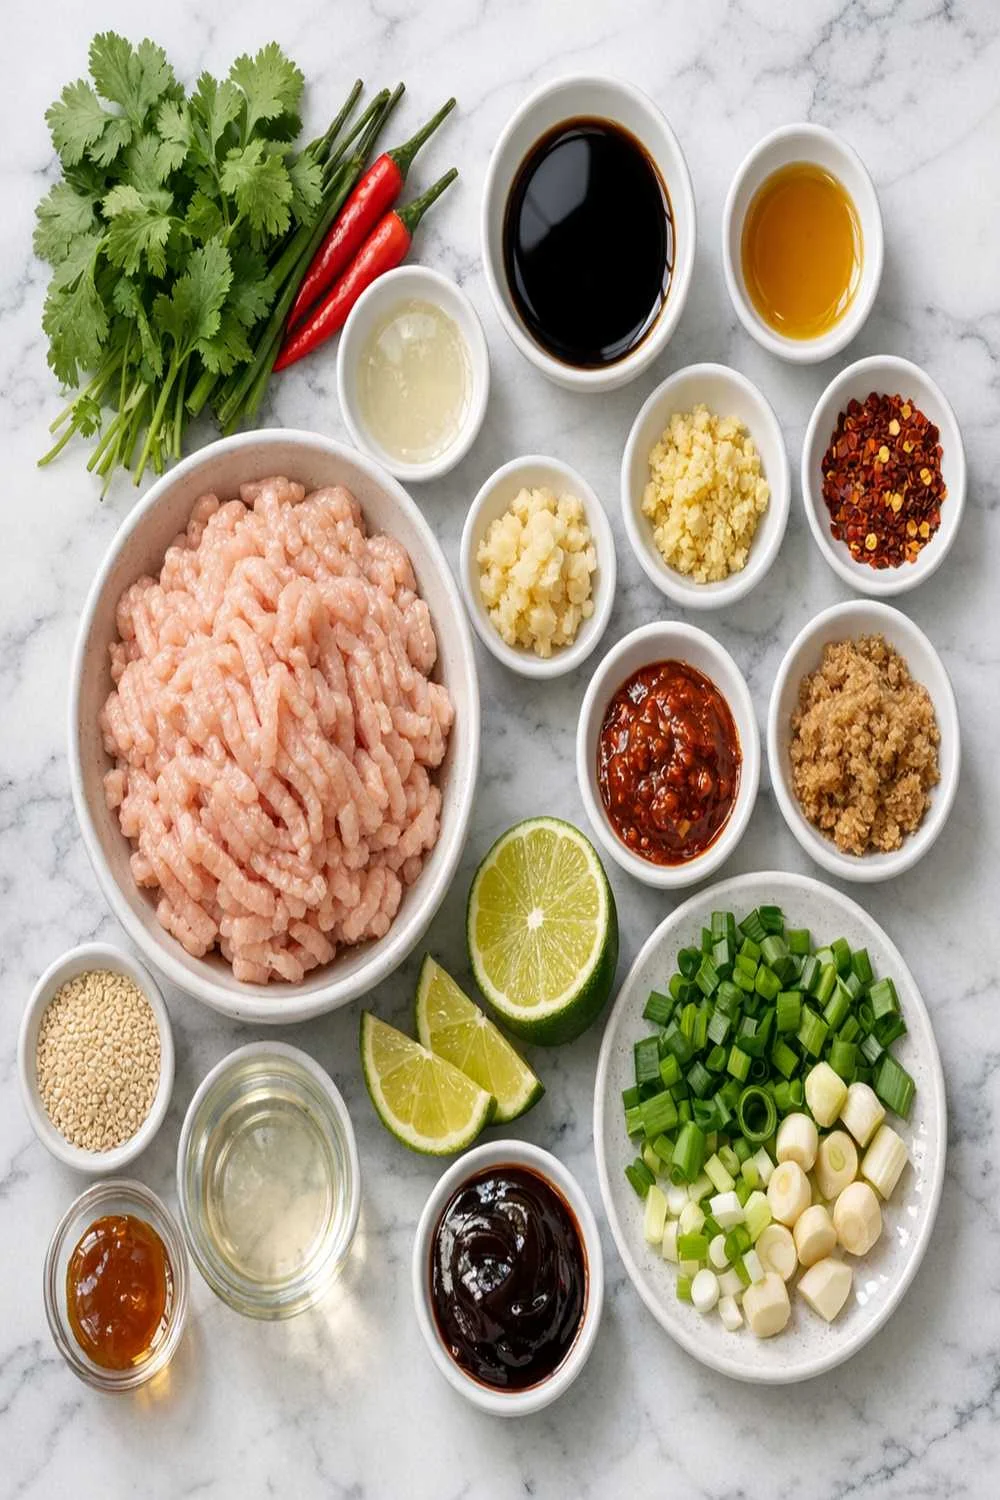
Before we dive into cooking, let me walk you through each ingredient and why it matters. I’ve organized these by function so you can understand how they work together to create a complete, nourishing meal. This recipe makes 4 servings if served as a main course with rice or noodles, or 6 servings if served in lettuce wraps as an appetizer or light meal.
For the Protein Base
- 1 pound ground chicken (preferably 93/7 lean-to-fat ratio for best flavor and nutrition)
- 1 tablespoon peanut oil (high smoke point, essential for proper browning)
For the Aromatics and Vegetables
- ½ medium onion (finely diced, about ¾ cup)
- 1 cup red or green bell pepper (finely diced, about 1 large pepper)
- 2 tablespoons fresh ginger (minced, adds warmth and aids digestion)
- ½ tablespoon minced garlic (fresh, not jarred, for best flavor)
- 8 ounces water chestnuts (drained and finely diced, canned is perfectly fine)
For the Sauce
- ½ teaspoon garlic powder (concentrated flavor, less moisture than fresh)
- 3 tablespoons hoisin sauce (adds depth and subtle sweetness)
- 1 tablespoon natural peanut butter (creamy texture, adds richness and protein)
- 3 tablespoons low-sodium soy sauce (reduces excess sodium while maintaining umami)
- ¼ teaspoon ground ginger (optional but recommended for added warmth)
- 2 teaspoons sweet chili sauce (adjust up or down based on heat preference)
- 1 tablespoon unseasoned rice vinegar (brightens flavors and aids digestion)
- 1 tablespoon toasted sesame oil (use the darker variety for authentic flavor)
- 1 tablespoon raw honey (subtle sweetness that balances heat and salt)
For Finishing and Serving
- ¼ cup roasted peanuts (crushed, adds crunch and additional protein)
- ¼ cup fresh green onions (sliced, adds fresh allium bite)
- Butter lettuce or your favorite crisp Asian lettuce (or serve over salad, rice, or noodles)
How to Make Asian Ground Chicken Recipe?
I’m going to walk you through each step with the kind of detail I share with my clients. This isn’t just about following instructions—it’s about understanding what’s happening at each stage so you can troubleshoot if needed and feel confident in the kitchen. Take your time, especially with the initial browning of the chicken, as this builds incredible flavor through a process called the Maillard reaction.
Step 1: Prepare Your Sauce Base
In a small bowl, whisk together your soy sauce, hoisin, sesame oil, rice vinegar, peanut butter, honey, chili sauce, garlic powder, and ground ginger. Stir this mixture until completely smooth and well combined. If you’re using conventional peanut butter (rather than natural), you may find the mixture is slightly thick. If this happens, microwave the bowl for 15-20 seconds to warm it, then whisk again. The goal is a sauce that’s pourable but still substantial. Set this aside—you’ll use it later, and having it ready means you won’t be scrambling once the chicken is cooking.
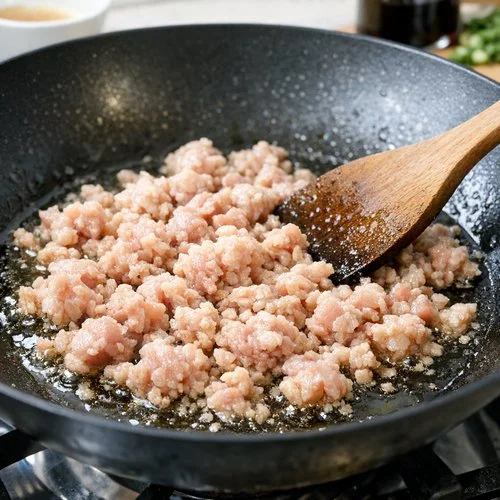
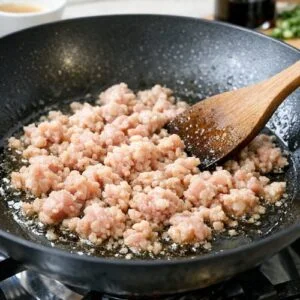
Step 2: Heat Your Oil and Begin Browning the Chicken
Place a large skillet or wok over medium-high heat. Add your peanut oil and let it heat for about 1-2 minutes until it shimmers and moves easily across the pan—this is your signal that it’s hot enough. Add your ground chicken, breaking it apart with a wooden spoon or spatula as it cooks. You’re looking for the chicken to lose its pink color and develop some light browning on the edges. This takes approximately 5-7 minutes.
Don’t walk away from the stove during this step. Stir occasionally, but not constantly—letting the meat sit for 30-second intervals allows the Maillard reaction to develop those deeply savory flavors that make this dish so satisfying.
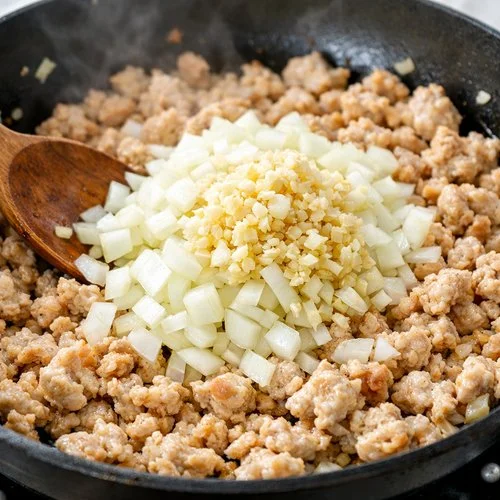
Step 3: Add Your Aromatics
Once the chicken is mostly cooked through (there can be a tiny bit of pink remaining), add your diced onion and minced garlic. Stir well to distribute them throughout the chicken. Cook for 2-3 minutes until the onion becomes translucent and the garlic is fragrant. You’ll notice the kitchen smelling absolutely incredible at this point—that’s your signal that the aromatics are releasing their flavor compounds.
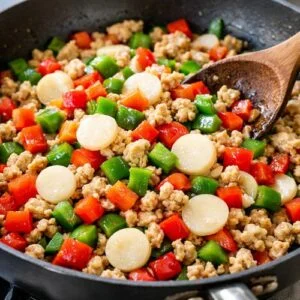
Step 4: Introduce Your Vegetables
Add the diced bell peppers and drained water chestnuts to the pan. Stir everything together so the vegetables are distributed evenly. Cook for approximately 5 minutes, stirring occasionally, until the peppers soften slightly but still maintain some bite. You want them tender enough to eat easily, but still with a hint of their fresh crispness. The water chestnuts should warm through but don’t need any special cooking—they’re already tender from the canning process.

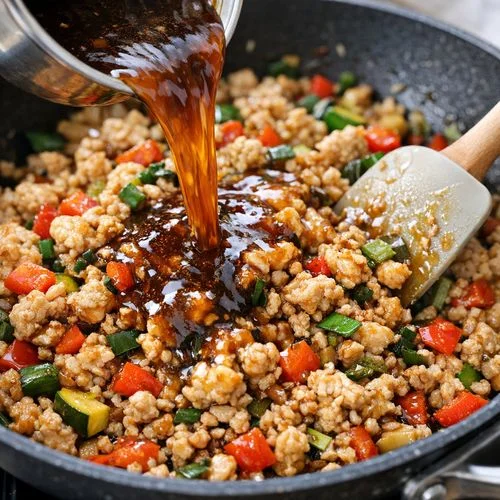
Step 5: Combine Everything With Your Sauce
Pour your prepared sauce over the chicken and vegetables. Using a spoon or silicone spatula, gently fold everything together, ensuring every piece of chicken and every vegetable gets coated with the sauce. Reduce your heat to low and simmer for 2-3 minutes until everything is heated through and the sauce coats the chicken. You should see a glossy sheen developing over the mixture.
Taste the dish at this point. If you’d like it spicier, you can add another teaspoon of chili sauce. If it tastes too salty, a splash of water will dilute it slightly. This is your moment to personalize it to your preferences.
Step 6: Prepare Your Serving Vehicle and Finish
While your chicken is simmering, prepare your serving base—whether that’s arranging lettuce leaves on a platter, cooking rice, preparing noodles, or assembling your salad base. Once your chicken is ready, transfer it to a serving dish and top with crushed peanuts and fresh sliced green onions. These final touches add texture, freshness, and visual appeal.
Expert’s Nutritional Tip
Here’s what I always tell my clients: the peanut butter in this sauce isn’t frivolous. Yes, it adds creaminess, but more importantly, it contributes healthy monounsaturated fats that help your body absorb fat-soluble vitamins like vitamins A, D, E, and K from the vegetables. It also slows down the digestion of carbohydrates, which means more stable blood sugar throughout the afternoon and evening. This is why a dish like this, served with vegetables and whole grains, creates the kind of sustained energy that processed meals simply cannot match.
Make-Ahead Guide
I love this recipe for meal prep because it scales beautifully and tastes wonderful reheated. Here’s my professional approach to preparing this ahead of time:
- Full recipe prepared ahead – Cook the entire recipe as written, then cool to room temperature before transferring to glass storage containers. Store in the refrigerator for up to 4 days. To reheat, place in a skillet over medium heat with a splash of water, stirring occasionally until warmed through, or microwave individual portions in 1-2 minute intervals.
- Sauce only prepared ahead – Make just your sauce and store it in an airtight container in the refrigerator for up to 1 week. When you’re ready to cook, follow steps 1-4, then add your prepared sauce and finish as directed. This approach takes advantage of your time without compromising freshness.
- Ingredients prepped, not cooked – Dice your onion, peppers, and water chestnuts, then store them together in a container for up to 2 days. Measure your sauce ingredients into a small container as well. When dinner time arrives, you’ll simply heat oil, cook chicken, add your pre-prepped vegetables, and follow through. This cuts active cooking time to just 15 minutes.
- Freezing considerations – The cooked dish freezes well for up to 3 months. Thaw overnight in the refrigerator, then reheat gently. The vegetables will be slightly softer after freezing, so save this method for when you want maximum comfort and don’t mind that texture change.
Tips and Tricks
- Don’t skip the initial browning step – This is where serious flavor develops. If you add everything at once or rush this stage, you’ll end up with boiled chicken instead of beautifully browned, flavorful chicken. Give it the time it deserves.
- Use fresh garlic and ginger – While pantry staples like garlic powder have their place, fresh aromatics are absolutely worth the minimal effort here. The difference in final flavor is significant. If you only have jarred minced garlic, use it, but reduce slightly since it’s more concentrated.
- Don’t overcrowd your pan – Use a large skillet (at least 12 inches) or a wok. If your pan is too small, the chicken will steam instead of brown, and your vegetables won’t cook evenly. A spacious pan is one of the best investments you can make in your kitchen.
- Taste as you go – Everyone’s preference for salt, spice, and sweetness is different. Make it a habit to taste at the end and adjust with a pinch of additional chili sauce, a squeeze of lime juice, or a drizzle of sesame oil based on what your palate is telling you.
- Keep your ingredients measured before you start cooking – Professional chefs call this “mise en place,” and it’s a game-changer for stress-free cooking. Once you start cooking chicken, things move quickly, and you don’t want to be hunting for soy sauce or measuring honey while something is burning on the stove.
- Quality sesame oil matters – Invest in toasted (darker) sesame oil, not the clear variety. The flavor difference is tremendous, and a little goes a long way. Store it in your pantry away from heat, or even in the refrigerator to extend its shelf life.
Common Mistakes to Avoid
- Cooking on too high heat from start to finish – High heat is important for browning the chicken initially, but once you add vegetables and sauce, you need to reduce to medium or medium-low. High heat can burn the sauce and toughen your vegetables. Remember: browning requires high heat, but finishing requires gentleness.
- Not draining water chestnuts completely – Any excess liquid from the canning brine will dilute your sauce and make the final dish watery. Transfer drained water chestnuts to a paper towel and pat them dry before dicing. This small step makes a real difference.
- Using the wrong ground chicken – Ground chicken can vary significantly in fat content. I recommend looking for 93/7 or even 95/5 if available. Higher fat content (like 85/15) will create a greasier final dish, though flavor will be slightly richer. Read the label at your grocery store.
- Cooking vegetables until completely soft – Asian cooking values texture contrast. You want your peppers tender but still with a bit of firmness, not mushy. This happens quickly—usually around 5 minutes—so watch carefully rather than leaving it unattended.
Seasonal Variations
One of my favorite things about this recipe is how easily it adapts throughout the year. Here’s how I shift it seasonally:
- Spring version – Replace half the bell pepper with fresh sugar snap peas and add baby bok choy alongside the water chestnuts. The peas add sweetness that complements the spring season, and bok choy becomes tender very quickly. This lighter version feels perfect with fresh lettuce wraps and an emphasis on green onions.
- Summer version – Use any combination of fresh vegetables: zucchini, summer squash, fresh corn kernels, or even diced tomatoes added at the very end so they don’t break down completely. I often serve this over a chilled bean sprouts salad during summer months for a meal that’s both warm and refreshing.
- Fall version – Add diced carrots and mushrooms, which become sweeter as the season progresses. I sometimes incorporate a tablespoon of white miso into the sauce for deeper umami that feels more comforting as temperatures drop. Serve over brown rice or with roasted sweet potato.
- Winter version – Use more garlic and ginger (they warm from the inside out), and consider adding shiitake mushrooms or even diced broccoli. Serve over egg noodles or rice for something more substantial and comforting. A squeeze of fresh lemon juice at the end brightens everything beautifully.
Can I Store Asian Ground Chicken Recipe?
Absolutely, and I’m glad you’re thinking about storage. This is genuinely one of the best recipes for building meal prep into your week.
Refrigerator storage: Transfer cooled chicken to an airtight glass container and store for up to 4 days. The flavors actually deepen slightly overnight, making it even better on day 2. Reheat gently in a skillet over medium heat with a splash of water, or microwave individual portions in 1-2 minute intervals, stirring halfway through.
Freezer storage: This dish freezes beautifully for up to 3 months. Cool completely, transfer to a freezer-safe container or resealable bag, and label with the date. Thaw overnight in the refrigerator before reheating. The vegetables will have a slightly softer texture after freezing, which honestly works beautifully if you’re planning to serve over noodles or rice rather than in lettuce wraps.
Component storage: If you’ve only cooked part of the recipe or made the sauce ahead, individual components keep as follows: sauce alone stores for up to 1 week in the refrigerator, and prepped vegetables last 2-3 days in airtight containers. Cooked chicken without sauce keeps for 3-4 days refrigerated, or 2-3 months frozen.
Pro tip: If freezing individual portions, freeze them in flat containers or resealable bags rather than deep containers. They thaw faster and take up less space. You can also freeze portions right in the vessel you’ll reheat them in—just ensure it’s freezer-safe glass or ceramic.
Nutrition Information
Let me break down what’s happening nutritionally when you eat this dish. Per serving (based on 4 servings with chicken and vegetables only, not including rice, noodles, or lettuce base):
- Calories: 285
- Protein: 28g (supporting muscle maintenance and satiety)
- Total Fat: 12g (primarily from peanut oil and sesame oil—heart-healthy monounsaturated fats)
- Saturated Fat: 2.5g (minimal, supporting cardiovascular health)
- Carbohydrates: 18g (including 3g fiber from vegetables)
- Sodium: 920mg (from soy sauce and hoisin; if using low-sodium varieties, this drops to approximately 680mg)
- Sugars: 10g (primarily from hoisin sauce and honey; all naturally occurring)
According to USDA Nutrient Database, ground chicken (93/7) provides approximately 165 calories and 26g protein per 3-ounce serving, making it an excellent lean protein choice. The bell peppers contribute vitamin C (supporting immune function), while water chestnuts provide potassium and copper. The garlic and ginger add bioactive compounds with documented anti-inflammatory properties.
What I love about this recipe is that it delivers complete nutrition without requiring supplements or superfoods. Every ingredient serves a purpose, both in terms of flavor and nutrition. This is eating in a way that nourishes your body and brings joy—exactly what food should do.
What Can I Serve With Asian Ground Chicken Recipe?
The beauty of this dish is its flexibility. Depending on your mood, your schedule, and your nutritional goals, you have wonderful options for how to serve it. Here are my favorite combinations:
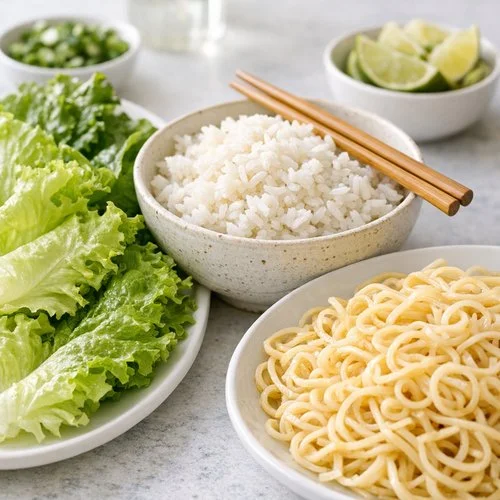
- In crisp lettuce wraps – Use butter lettuce, romaine hearts, or even sturdy iceberg lettuce leaves as edible vehicles. Top with the chicken mixture, then add crushed peanuts, green onions, fresh cilantro if you enjoy it, and a drizzle of extra sesame oil. These are naturally low-carb, fun to eat with your hands, and perfect for meal prep since you assemble them just before eating.
- Over brown rice or white rice – A ½ cup serving of cooked brown rice adds approximately 110 calories, 2.3g protein, and fiber that supports digestion. The rice soaks up all the wonderful sauce, and you get a complete, satisfying meal. This is my go-to when I want something warming and substantial.
- With egg noodles or rice noodles – Toss 1 cup of cooked noodles with a touch of sesame oil and green onions, then top with the chicken mixture. This creates a dish similar to what you’d find at an Asian restaurant, and the noodles’ texture contrasts beautifully with the tender vegetables.
- Atop a fresh salad – Arrange your favorite Asian salad greens (mixed greens, arugula, or that bean sprouts salad I mentioned earlier), then warm the chicken mixture and spoon it over the top. Serve immediately so the warmth just slightly wilts the greens while they maintain their crunch. This is my favorite option for lighter meals.
- In whole wheat pita pockets – For something different, warm whole wheat pita bread and fill with the chicken mixture, some shredded cucumber, and fresh herbs. It’s unconventional but absolutely delicious.
- Over cauliflower rice – For clients managing carbohydrate intake, serving this over cauliflower rice (either homemade or store-bought riced cauliflower) creates a satisfying, lower-carb meal. The sauce is rich enough that you won’t miss the starch.
Substitutes
- Ground turkey for ground chicken – Use the same amount and cooking time. Turkey is slightly leaner and has a marginally different flavor, but it works beautifully here. The final dish will be approximately the same nutritionally, with turkey offering slightly less fat.
- Ground pork for ground chicken – A 93/7 ground pork works here, though expect slightly richer flavor. You may want to reduce the peanut oil to 2 teaspoons since pork carries more fat. Cook time remains the same.
- Tofu or tempeh for ground chicken – Crumble firm tofu or tempeh and brown it in the peanut oil until slightly crispy, then proceed as written. This is a wonderful plant-based variation. Tofu will need only 3-4 minutes of browning, while tempeh (which is already cooked) needs about 2-3 minutes to warm and crisp slightly. You’ll lose some of the protein (tofu provides 8g per ½ cup compared to chicken’s 26g), so consider serving alongside beans or additional vegetables.
- Sesame oil alternatives – If you don’t have toasted sesame oil, you can omit it and increase your peanut oil by ½ tablespoon, or use avocado oil as a neutral substitute. The flavor won’t be quite as rich, so taste and adjust with a pinch of additional soy sauce if needed.
- Natural peanut butter vs. conventional – Either works, though natural versions have less sugar and no additives. Just ensure you’re purchasing peanut butter without added oils or salt if you prefer to control sodium. Almond butter or sunflower seed butter work in a pinch for those with peanut allergies, though the flavor shifts slightly.
- Water chestnuts substitute – If you can’t find them or prefer something different, use diced celery (adds crunch), diced mushrooms (adds umami), or additional bell pepper. Each changes the final dish slightly, but all work beautifully. Bamboo shoots are another authentic substitute if you have access to them.
- Sweet chili sauce alternatives – If you don’t have sweet chili sauce, create a similar effect with ¼ teaspoon cayenne pepper plus an additional ½ teaspoon honey. Or simply omit it and increase soy sauce by ½ tablespoon for more savory depth instead of sweet heat.
- Hoisin sauce alternatives – This is a bit trickier to replace since hoisin is fairly unique. In a pinch, combine 2 tablespoons ketchup with 1 tablespoon molasses or brown sugar, ½ tablespoon soy sauce, and ¼ teaspoon garlic powder. It’s not identical, but it approximates the sweet-savory profile.
Asian Ground Chicken Recipe
Ingredients
For the Protein Base
- 1 pound ground chicken preferably 93/7 lean-to-fat ratio for best flavor and nutrition
- 1 tablespoon peanut oil high smoke point, essential for proper browning
For the Aromatics and Vegetables
- ½ medium onion finely diced, about ¾ cup
- 1 cup red or green bell pepper finely diced, about 1 large pepper
- 2 tablespoon fresh ginger minced, adds warmth and aids digestion
- ½ tablespoon minced garlic fresh, not jarred, for best flavor
- 8 ounce water chestnuts drained and finely diced, canned is perfectly fine
For the Sauce
- ½ teaspoon garlic powder concentrated flavor, less moisture than fresh
- 3 tablespoon hoisin sauce adds depth and subtle sweetness
- 1 tablespoon natural peanut butter creamy texture, adds richness and protein
- 3 tablespoon low-sodium soy sauce reduces excess sodium while maintaining umami
- ¼ teaspoon ground ginger optional but recommended for added warmth
- 2 teaspoon sweet chili sauce adjust up or down based on heat preference
- 1 tablespoon unseasoned rice vinegar brightens flavors and aids digestion
- 1 tablespoon toasted sesame oil use the darker variety for authentic flavor
- 1 tablespoon raw honey subtle sweetness that balances heat and salt
For Finishing and Serving
- ¼ cup roasted peanuts crushed, adds crunch and additional protein
- ¼ cup fresh green onions sliced, adds fresh allium bite
- Butter lettuce or your favorite crisp Asian lettuce or serve over salad, rice, or noodles
Instructions
Step 1: Prepare Your Sauce Base
- In a small bowl, whisk together your soy sauce, hoisin, sesame oil, rice vinegar, peanut butter, honey, chili sauce, garlic powder, and ground ginger. Stir this mixture until completely smooth and well combined. If you're using conventional peanut butter (rather than natural), you may find the mixture is slightly thick. If this happens, microwave the bowl for 15-20 seconds to warm it, then whisk again. The goal is a sauce that's pourable but still substantial. Set this aside—you'll use it later, and having it ready means you won't be scrambling once the chicken is cooking.

Step 2: Heat Your Oil and Begin Browning the Chicken
- Place a large skillet or wok over medium-high heat. Add your peanut oil and let it heat for about 1-2 minutes until it shimmers and moves easily across the pan—this is your signal that it's hot enough. Add your ground chicken, breaking it apart with a wooden spoon or spatula as it cooks. You're looking for the chicken to lose its pink color and develop some light browning on the edges. This takes approximately 5-7 minutes. Don't walk away from the stove during this step. Stir occasionally, but not constantly—letting the meat sit for 30-second intervals allows the Maillard reaction to develop those deeply savory flavors that make this dish so satisfying.
Step 3: Add Your Aromatics
- Once the chicken is mostly cooked through (there can be a tiny bit of pink remaining), add your diced onion and minced garlic. Stir well to distribute them throughout the chicken. Cook for 2-3 minutes until the onion becomes translucent and the garlic is fragrant. You'll notice the kitchen smelling absolutely incredible at this point—that's your signal that the aromatics are releasing their flavor compounds.

Step 4: Introduce Your Vegetables
- Add the diced bell peppers and drained water chestnuts to the pan. Stir everything together so the vegetables are distributed evenly. Cook for approximately 5 minutes, stirring occasionally, until the peppers soften slightly but still maintain some bite. You want them tender enough to eat easily, but still with a hint of their fresh crispness. The water chestnuts should warm through but don't need any special cooking—they're already tender from the canning process.
Step 5: Combine Everything With Your Sauce
- Pour your prepared sauce over the chicken and vegetables. Using a spoon or silicone spatula, gently fold everything together, ensuring every piece of chicken and every vegetable gets coated with the sauce. Reduce your heat to low and simmer for 2-3 minutes until everything is heated through and the sauce coats the chicken. You should see a glossy sheen developing over the mixture. Taste the dish at this point. If you'd like it spicier, you can add another teaspoon of chili sauce. If it tastes too salty, a splash of water will dilute it slightly. This is your moment to personalize it to your preferences.

Step 6: Prepare Your Serving Vehicle and Finish
- While your chicken is simmering, prepare your serving base—whether that's arranging lettuce leaves on a platter, cooking rice, preparing noodles, or assembling your salad base. Once your chicken is ready, transfer it to a serving dish and top with crushed peanuts and fresh sliced green onions. These final touches add texture, freshness, and visual appeal.

Notes
Nutrition
FAQs
Can I use ground chicken that’s already seasoned?
I’d recommend starting with plain ground chicken for this recipe. Pre-seasoned varieties often contain salt and spices that aren’t complementary to Asian flavors, and you won’t have control over your final salt content. Plain ground chicken is easy to find (it’s usually the most common variety at any grocery store), and it lets your sauce shine through without competing flavors. If plain ground chicken isn’t available, just rinse the seasoned kind under cold water—this removes much of the surface seasoning—though this step isn’t ideal.
How can I make this recipe less spicy for kids?
Reduce or eliminate the sweet chili sauce entirely—it’s really the only heat source in this recipe. The hoisin and other ingredients are actually quite mild. Start with ½ teaspoon chili sauce instead of 2 teaspoons, make the dish, then taste and add more only if you want. Many kids actually enjoy this dish because the hoisin provides subtle sweetness that appeals to younger palates. The vegetables are also soft enough for kids to chew easily, and you can finely dice them even smaller if you’re working with younger eaters.
What’s the difference between sesame oil and peanut oil?
These serve different purposes. Peanut oil has a neutral flavor and a high smoke point (around 450°F), making it perfect for the initial browning of chicken. Sesame oil is made from toasted sesame seeds and has a rich, distinctive flavor. It has a lower smoke point (around 350°F), so it’s never used for initial cooking—it’s added at the end to finish a dish. Think of peanut oil as your cooking oil and sesame oil as your flavoring oil. In this recipe, you need both for different reasons.
Can I make this in a slow cooker or instant pot?
You can, though the result will be slightly different. For slow cooker: Brown the chicken in a separate skillet first (this step is important for flavor), then transfer to the slow cooker with all remaining ingredients. Cook on low for 2-3 hours. The vegetables will be quite soft, but the flavors meld beautifully.
For Instant Pot: Use the sauté function to brown chicken and vegetables, then add sauce and cook on high pressure for 2 minutes. The vegetables will be tender and the dish comes together quickly. The texture is slightly different from stovetop cooking, but it’s still delicious and a time-saver on particularly busy days.
Is this gluten-free?
Most of the ingredients are naturally gluten-free, but you’ll need to check your soy sauce. Regular soy sauce contains wheat, making it not gluten-free. However, tamari (which is soy sauce made without wheat) is widely available and has nearly identical flavor. Use the same amount of tamari in place of regular soy sauce, and your entire dish becomes gluten-free. Also verify that your hoisin sauce doesn’t contain wheat—most brands are gluten-free, but it’s worth checking the label since formulations vary. The rest of the ingredients—chicken, oil, vegetables, sesame oil, rice vinegar, peanut butter, honey, chili sauce, and spices—are all naturally gluten-free.
How do I know when the chicken is fully cooked?
Ground chicken is safely cooked when it reaches an internal temperature of 165°F. In practice, you’ll know it’s done when it’s completely opaque throughout (no pink remaining) and has begun browning on the edges. Since it’s ground, you don’t need to use a meat thermometer—just break apart a piece with your spatula to check for any remaining pink. It happens quickly, usually within 5-7 minutes over medium-high heat, so check frequently.
More Recipes You’ll Love
- Bean Curd Home Style Recipe – Another wonderful Asian-inspired dish that shares similar flavor profiles and pantry ingredients with this chicken recipe
- Asian Inspired Chili Recipe – Uses some of the same aromatics and sauces, bringing that same depth of flavor to a completely different dish
- Baked Cha Siu Bao Recipe – If you loved the Asian flavors here, these steamed buns are a perfect complement